
Day 2 - Faux Bone Class with Melissa Cable

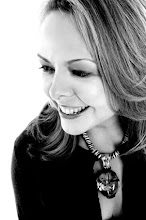
My second day of jewellery making was something that I had been very excited about. I'd heard about 'faux bone' a product developed by American artist Robert Dancik and was intrigued. Robert was scheduled to come and teach at the Festival but needed to undergo emergency back surgery. Luckily, the rather fabulous Melissa Cable, who works closely with Robert, was able to step in and jet across to Switzerland and I'm so glad she did. Melissa is like a breath of fresh air as a teacher. She is bright, vivacious, brimming with enthusiasm and uber talented. Here is a beautiful piece that Melissa created using faux bone and it is an incredibly detailed work of art. You can find out more about Melissa and her work by visiting her website www.melissacable.com
 |
| Melissa Cable's Time of my Life Pendant |
Melissa started the class by taking us through all the basics of working with faux bone, which is a very pure form of PVC. You can cut it to the shape you want using a saw and and then trim and sand the edges to make it smooth and perfect. There are various ways the surface of the faux bone can be treated to give it an aged appearance or to add colour. Melissa explained every step so clearly that we were all chomping at the bit to have a go. Armed with three sheets of varying thicknesses of faux bone, we were let loose in the huge jewellery room to play and create. Melissa let us get on with the job but was always at hand to make useful suggestions about how our designs might work best.
 |
| Sawing the faux bone |
 | |
| Score & scour the faux bone or hammer it to add surface effects |

Alcohol inks and brown shoe polish rubbed across the faux bone give it a wonderfully earthy look. In fact it is quite incredible what you can do with this material. You can heat it up to bend and twist it into different shapes....


So many ideas...so little time! However, here is my attempt at creating a pendant with a faux bone background and copper domed shape. I added a faux bone dome to the centre dyed pink with alchohol ink and attached a piece of scrap silver clay as a bail at the top. This was a very big departure for me style-wise but I enjoyed the challenge and freedom of working very differently. I made two bangles and this pendant and I still had lots of the material left over. I'd definitely use faux bone again and again. It's incredibly versatile and great fun to work with.

No comments:
Post a Comment